

This initial view of the Posts tab shows how many posts exist, the date and time of publication if it is live, and links to ‘Create a new one’, ‘View’ and ‘Delete’ a post. If you want to edit the post, simply click the title of the post and it will take you into the Edit Post screen.
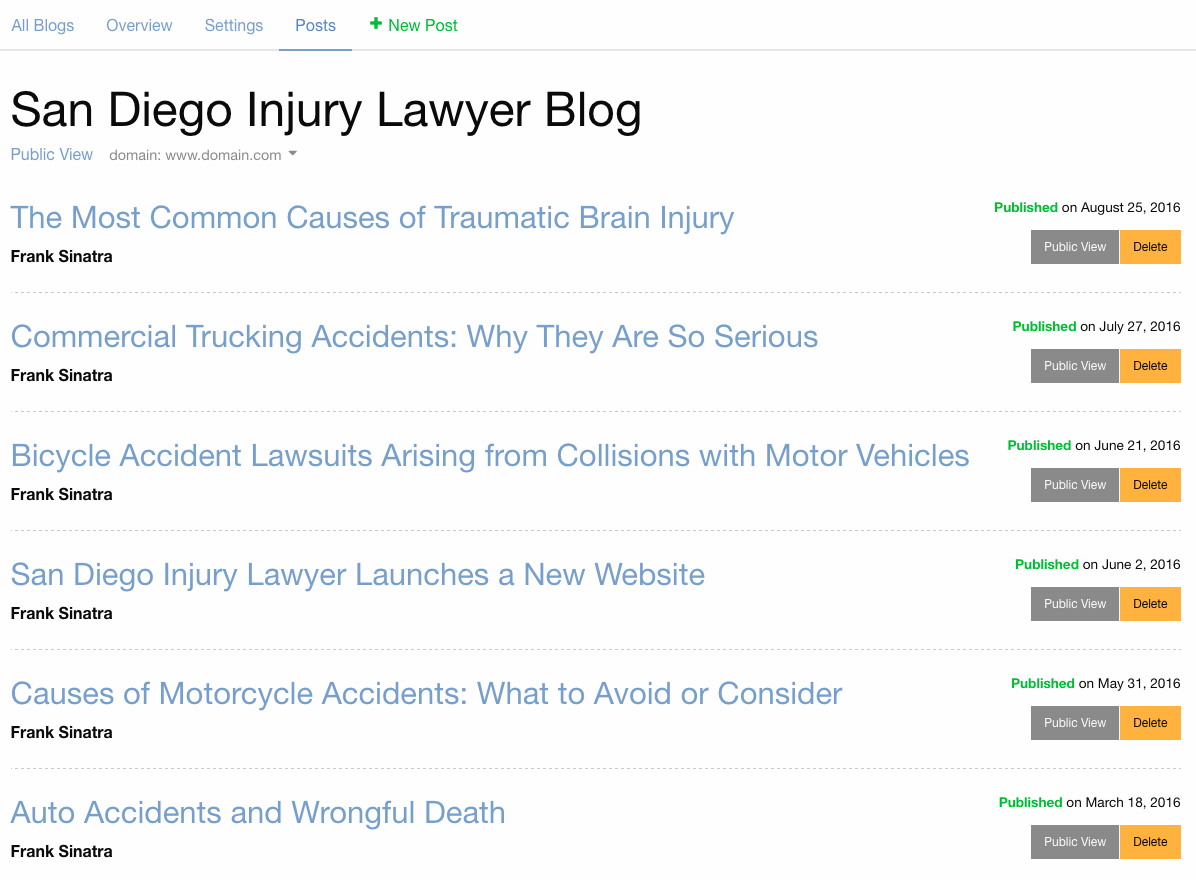
Clicking the ‘Public View’ link shows you how that post looks live. The ‘Delete’ link will delete that post however: you should never delete a Blog post. Deleting a Blog post is like deleting a page from the website and can cause your website to fall in the natural positioning of Google’s organic search results. If you don’t want anyone to see that Blog post, please change the status from Published to Draft rather than deleting the post.
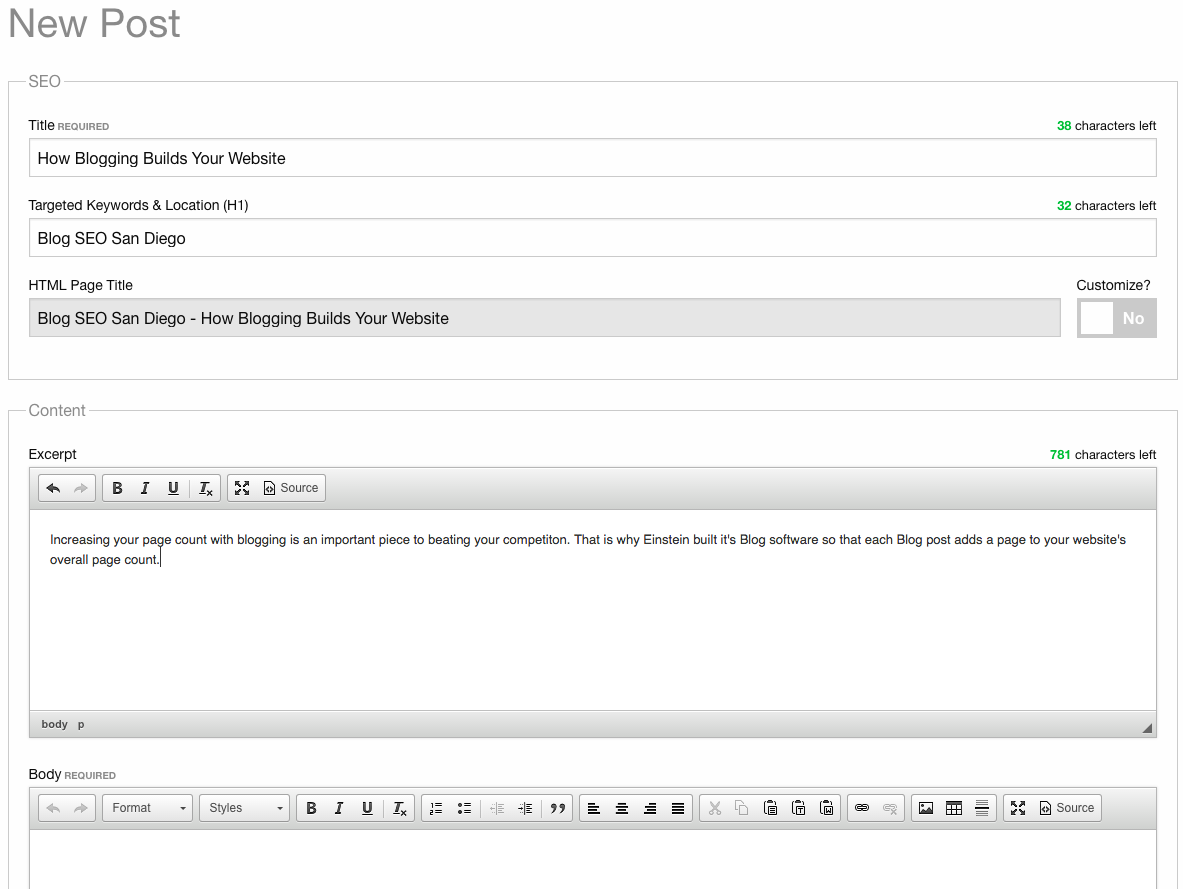
Post Title: Add the title of your post here. It should contain the complete idea of your Blog post.
H1 (Targeted Keywords + Locations): These are the keywords you want your Blog post to be found in the search engines with. They should be a combination of your location and specialty. For example "Personal Injury Manhattan".
HTML Page Title: This field is automatically generated and will be combined with the Blog Title for SEO purposes.
Excerpt: This field is what will initially be displayed on your Blog page along with the Post Title. Enter a brief, one or two sentence description of the Blog post. There is a character limit of 1000 but the actual limit can be a bit lower than 1000 so if you are getting close to that character limit then please consider revising your summary. Keep in mind that today people are scanning websites more than reading them and this field offers your potential patients/clients something to scan. Being to wordy here may put some people off. The toolbar offers standard formatting and the ability to insert a picture but we suggest you use plain text with no images for this field. Notice how Firefox highlights the words that are either misspelled or not in your browsers dictionary with a red wavy underline. Right click on the word to either correct it or add it to your browser’s dictionary.
Body: Enter your complete post of original content here. We advise against using any content that exists anywhere else in the internet as Google will see this as “duplicate content” and may blacklist the Blog post, or in extreme cases, the website itself. A good post contains imagery, separate paragraphs, headings and hyperlinks like you see above. Imagery helps set a tone. Separate paragraphs with headings help the reader find the section that interests him or her most. Headings also provide your reader with something to scan. Most of a person‘s time on any website is spent scanning headings. Providing your readers with something to scan makes your site user friendly. Another benefit to adding headings above your paragraphs is that Google scans headings for relevancy to key terms. As such, it is beneficial to include appropriate key terms in your headings.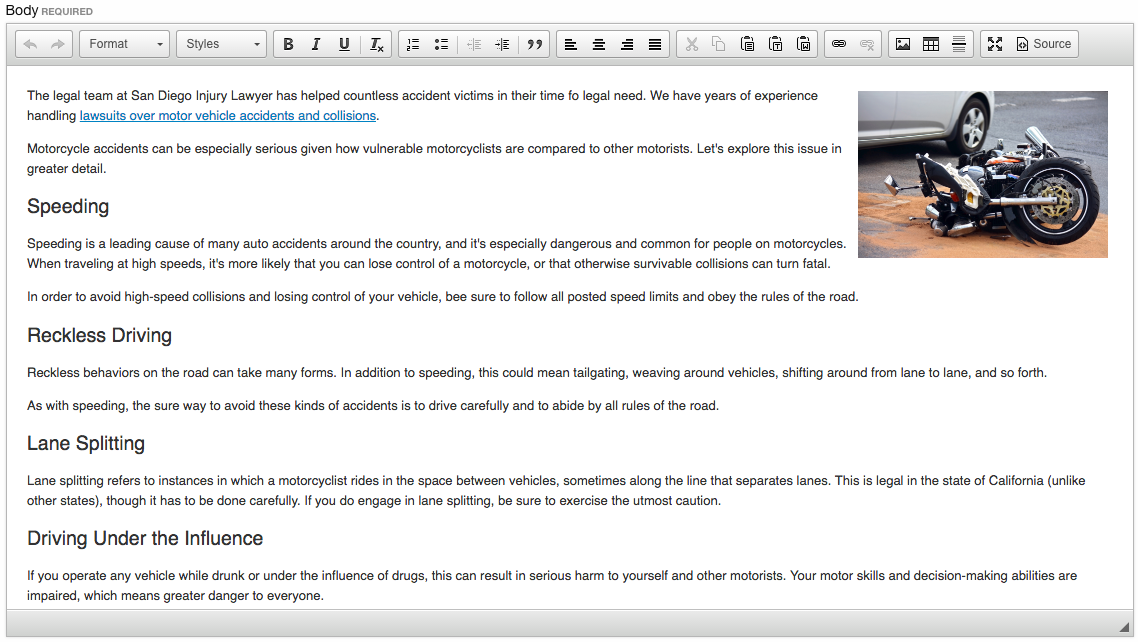
In the toolbar, you’ll notice that there isn’t an adjustment for font style or size. This is to ensure that all of your posts stylistically match the website. We do suggest you give titles to your paragraphs in the form of Headings. The standard heading to use, available from the dropdown menu on the far left, is “Heading 2”. A paragraph is always formatted as “Normal”. If you would like to include images in your blog post, you can learn how to insert a picture into your Blog post by watching the short training video available at the provided link. To lead your reader into the next topic. add a hyperlink at the end of your Blog post. The Source button lets you view the source code of the Blog post. You can paste embedded code from YouTube or Google to add video or maps to your Blog posts.![]()
To create a hyperlink, first go to the page you want to link to and copy the URL from the address bar. Then highlight the word you want to link, click the link button![]() , paste the address you copied into the URL field, and click ‘OK’. While it is a good idea to link to other pages on your website, it is generally not a good idea to link out to other websites. For example you may think it is a good idea to link to Carecredit’s home page, but they have a Doctor Locator page that may lead your potential patents to other doctors.
, paste the address you copied into the URL field, and click ‘OK’. While it is a good idea to link to other pages on your website, it is generally not a good idea to link out to other websites. For example you may think it is a good idea to link to Carecredit’s home page, but they have a Doctor Locator page that may lead your potential patents to other doctors.
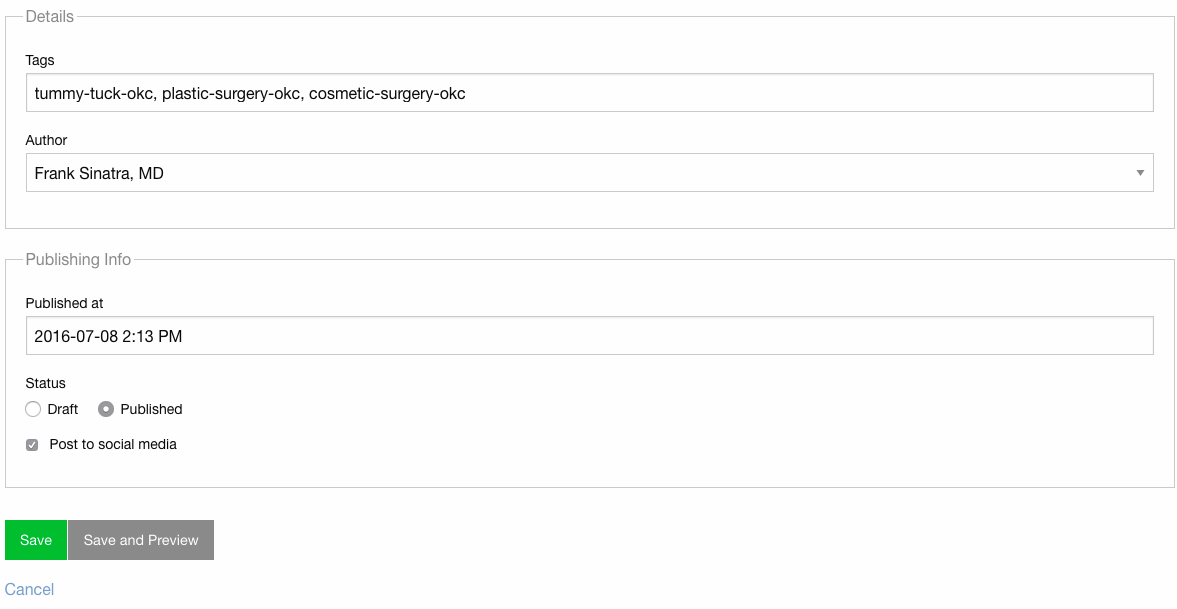
Post to social media: This is for our Blog client’s that have purchased the Social Media Kit. Checking this box will send your Blog post to your Facebook, Twitter and LinkedIn accounts. This is the easiest and most effective way to keep your patients informed about the practice.
Tags: Enter three to five comma separated key terms like you see above. The software will add a hyphen anywhere you leave a space. Tags that appear in multiple Blog posts will appear as quick links in the margin of your blog page. These allow the user to view only the Blog posts with those tags.
Status: Every Blog post exists in one of two states: it is either Published and live to the world, or in Draft mode and hidden from public view. Work on your Blog post in Draft mode then switch it to Published when you are ready to go live.
Author: Any user can pick any other user as having authored that Blog post. You may want to create additional users for anyone that you plan on giving credit to as having authored a post.
Published at: This field will provide a time stamp when you publish your Blog post. You can also use this feature to set a Blog post to a future date so it will go live automatically on a certain day. This should be used if you are about to post more than one Blog post on the same day. Spacing out your Blog posts ensures that new posts are beneficial, and that your website is updated regularly. It is important that you make frequent changes to your website because Google uses that rate to help determine your position in the search results. Too much time between changes makes your ranking go down.
Once you’ve completed your new post, check your work to see how it will look to your audience by clicking ‘Create and Preview’. Click ‘Create’ if you are confident and happy with the results. If you are editing an existing post, click ‘Update and Preview’ or ‘Update’ if you are confident and happy with the results.
Note: If your Blog is live ensure the proper domain is selected from the drop down.
“My experience with Einstein has been amazing...Together we have created a website that presents my firm in the best light and according to the principles I embrace, our phone has started ringing off the wall…If you want to grow your firm or simply increase traffic to your website, this is the best and most complete answer to enhancing your online presence.”- Donna J. Smiedt, JD Family Law Attorney
ID#: 1723886440
Premier Partners are recognized among the top 3% of companies in the Google Premier Partners program.